Make Payment
Access the make payment page by clicking on the 'Make Payment' tab under the Payroll Management category. After clicking on the 'Make Payment' tab the Make payment page will appear. It will look like the following:
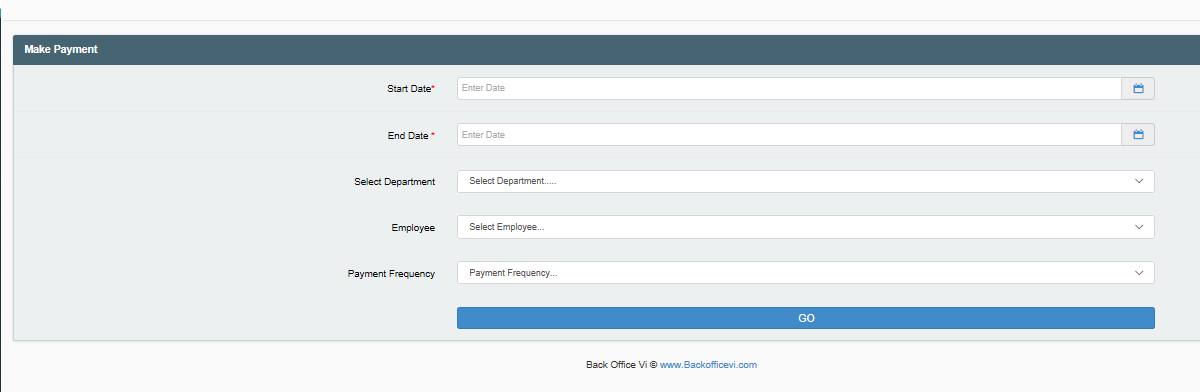
Image 1
As seen in the image, the Start Date and End Date fill boxes are red-starred and therefore mandatory to fill to complete this action. The Select Department, Employee and Payment Frequency are filled if a specific employee is being paid. If these three lower boxes are left unfilled, all payments to be made, for all workers, in the period of time selected, will be generated for viewing.
In the Example below, Kim Jones, an HR assistant is being paid for a selected pay period.
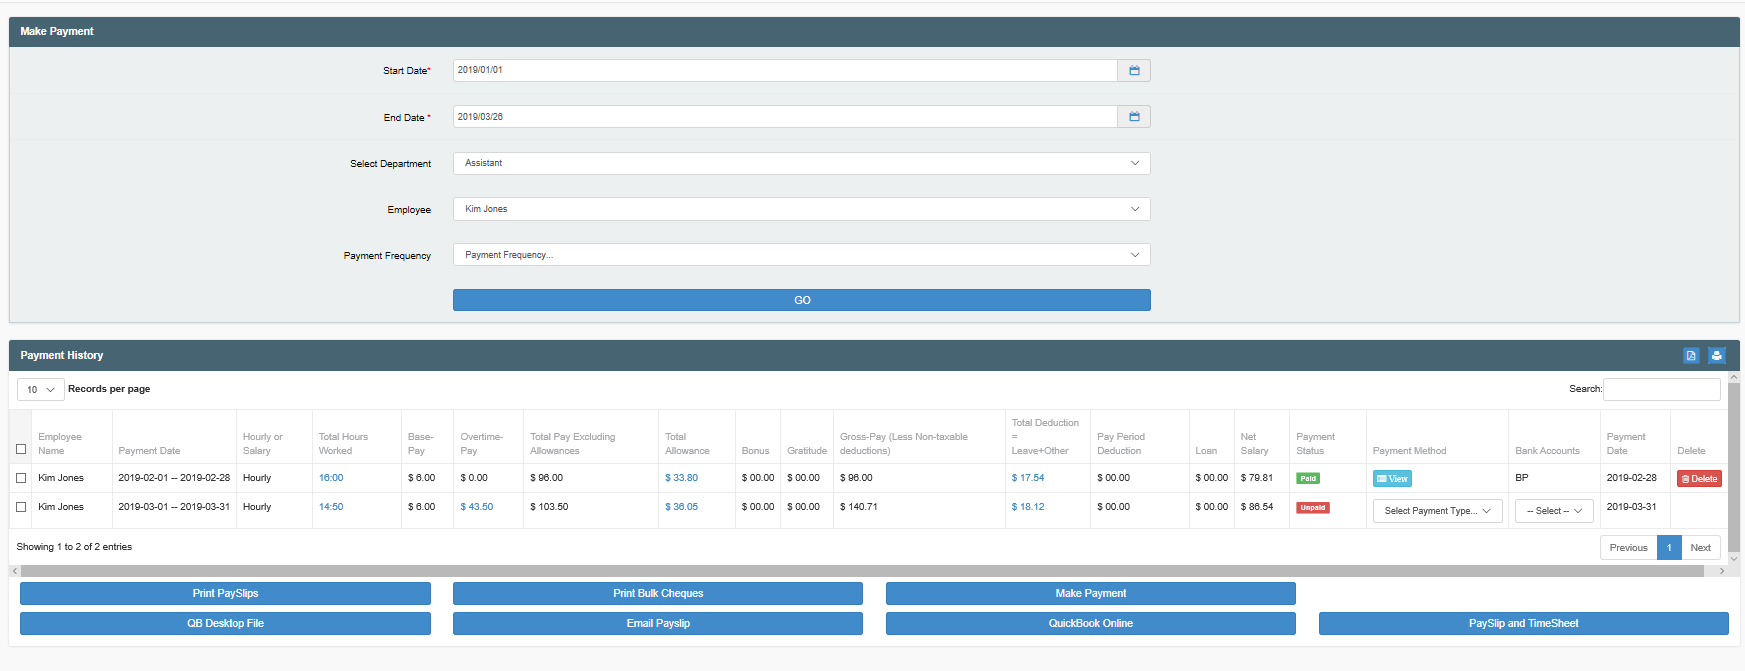
Image 2
In Image 2 it can be seen that Kim Jones has two pay periods listed, the first has been paid to her, as shown by the green 'Paid' button in the Payment Status coloumn of the first pay record with a net Salary of $79.81. Kim has not been paid for the second pay period as shown by the red 'unpaid' button in the Payment status coloumn of the second pay record. To make the second payment to Kim, the following would be done:
First, the hollow square in the first coloum of the pay record would be selected to indicate that the pay record is going to be processed. In the line of the payment, all light blue figures can be hovered over to see a transient break down of the sub-totals that combine to make that total. For instance, in the total deduction coloumn of the second pay record, the $18.12 figure is a sum-total of a test glow deduction of $10.00, a Social Security deduction of $4.10 and a National Health Insurance deduction of $3.93. This breakdown would be seen by placing the cursor on any portion of the blue, $18.12 figure, in that coloumn.
To proceed to make the payment, scroll over on the coloumns to the Payment Methods coloumn and click on the 'Select Payment' drop box. Choose between Cash Payment, Cheque Payment and Direct Deposit. If choosing the Cheque Payment option, the cheque number will be have to be filled out in the 'Cheque Details' pop-up box that will appear, as shown in Image 3. Fill in the Cheque number and click the white 'SAVE' to the bottom right of the pop-up and the cheque number will be saved to the payment details. The cheque number cannot be changed, so ensure that it is entered correctly.

Image 3
Next, select the Bank Account in the Bank Accounts coloumn in the payment line. (The bank account types are created in General Settings: Accouting- Accounts/Accounts Types- See Those articles for greater details on setting up Accounts, including Bank Accounts.)
Once the chosen payment methods and the bank accounts have been selected, locate the blue, 'Make Payment' button beneath the payment records. In Image 2, the Make payment button can be seen beneath the Total Deductions, and Pay period deduction coloumns. Click on the Make Payment button to make the payment to the employee. If the payment line has not been selected, the Make Payment cannot be made. If the following message appears, click its' 'O.K' button and the page will return to the Image 2 Make Payment page:
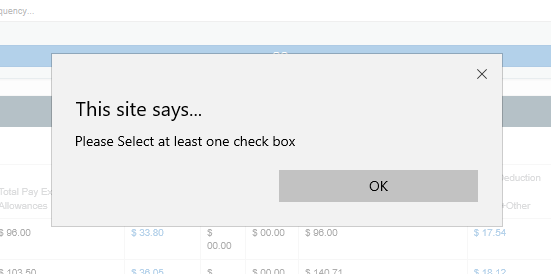
Image 4
On clicking on 'Make Payment' the page will revert to the Image 1 page, where the payment details must be entered again. This will include the mandatory Start date and End Date, and the optional Select Department, Employee and Payment Frequency. On doing this, and clicking on the 'Go' button, the updated payment records page will appear, showing the payment that has been made, in this instance, the second payment to Kim Jones, for the period of time selected. Observable in Image 5.
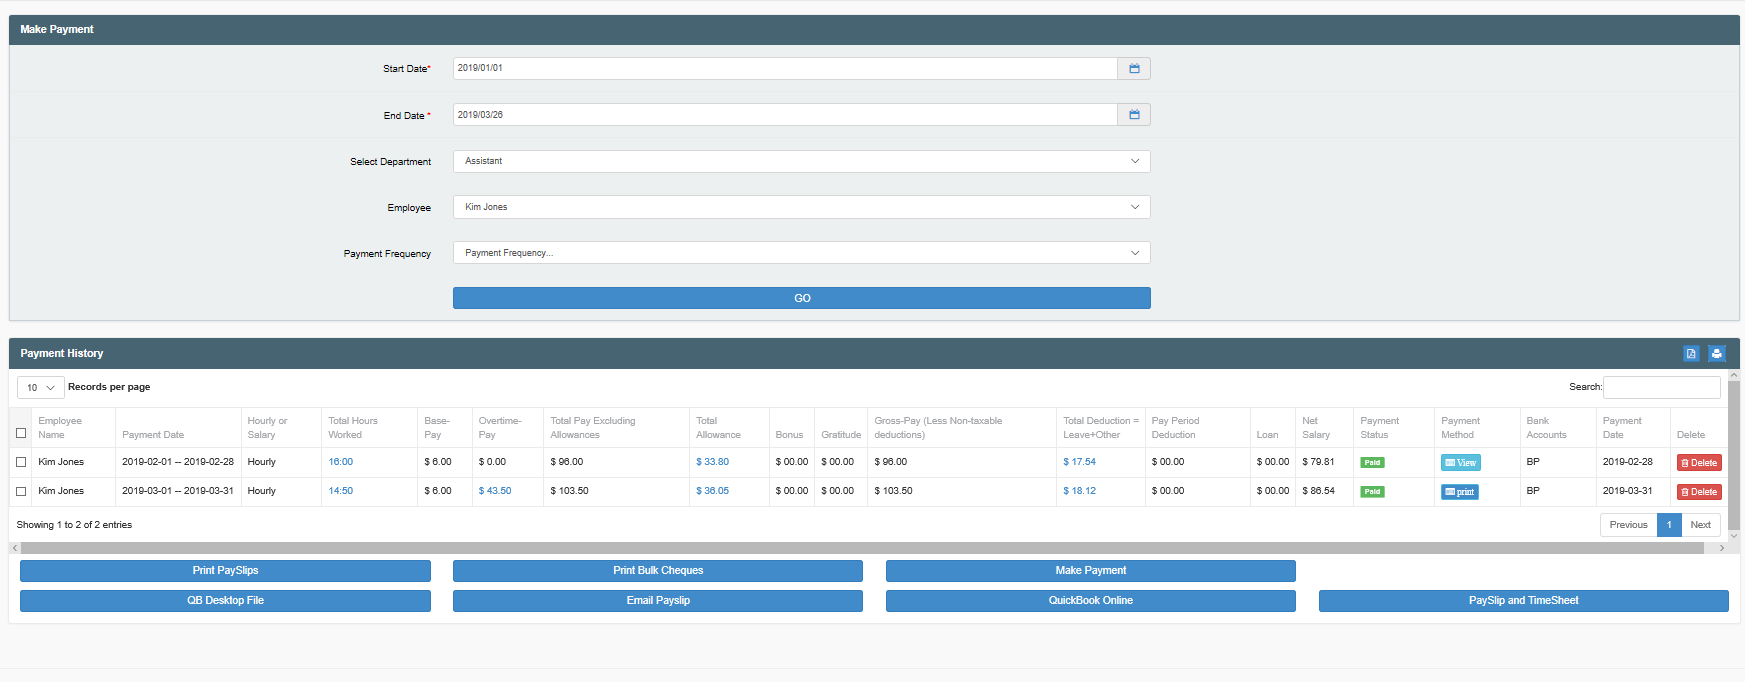
Image 5- Second Make Payment to Kim Jones, completed.
At this point, the payslip for any of the paid payment records can be accessed via the various options available immediately below the payment records. The payslips can be printed, viewed as a Quick Books Desktop File, emailed to the employee or other personnel, uploaded to QuickBooks, or viewed on your account page. To print the payslips click on the blue, 'Print Pay Slips' button to the upper right options of buttons. To view the payslip(s) in QuickBooks, click on the blue 'QB Desktop file' underneath the Print PaySlips button. To email the payslip(s) to the employee(s), click on the 'Email Payslips' button beneath the Print Bulk Cheques blue button. To view the payslip(s) on the Quickbook Online structure, click on the blue 'Quickbook' Online button. To simply view the payslip(s) in the page, click on the blue "Payslip and Time sheet' button, the final blue button to the right bottom of the payment history/pay records, table.
The cheque can now be printed from the blue 'Print' button in the Payment Methods coloumn. By clicking on the blue 'print' button, here, after completing the Make Payment process, the prepared cheque, will appear. As in the above example, the Kim Jones cheque payment was created. This is displayed in the following image:
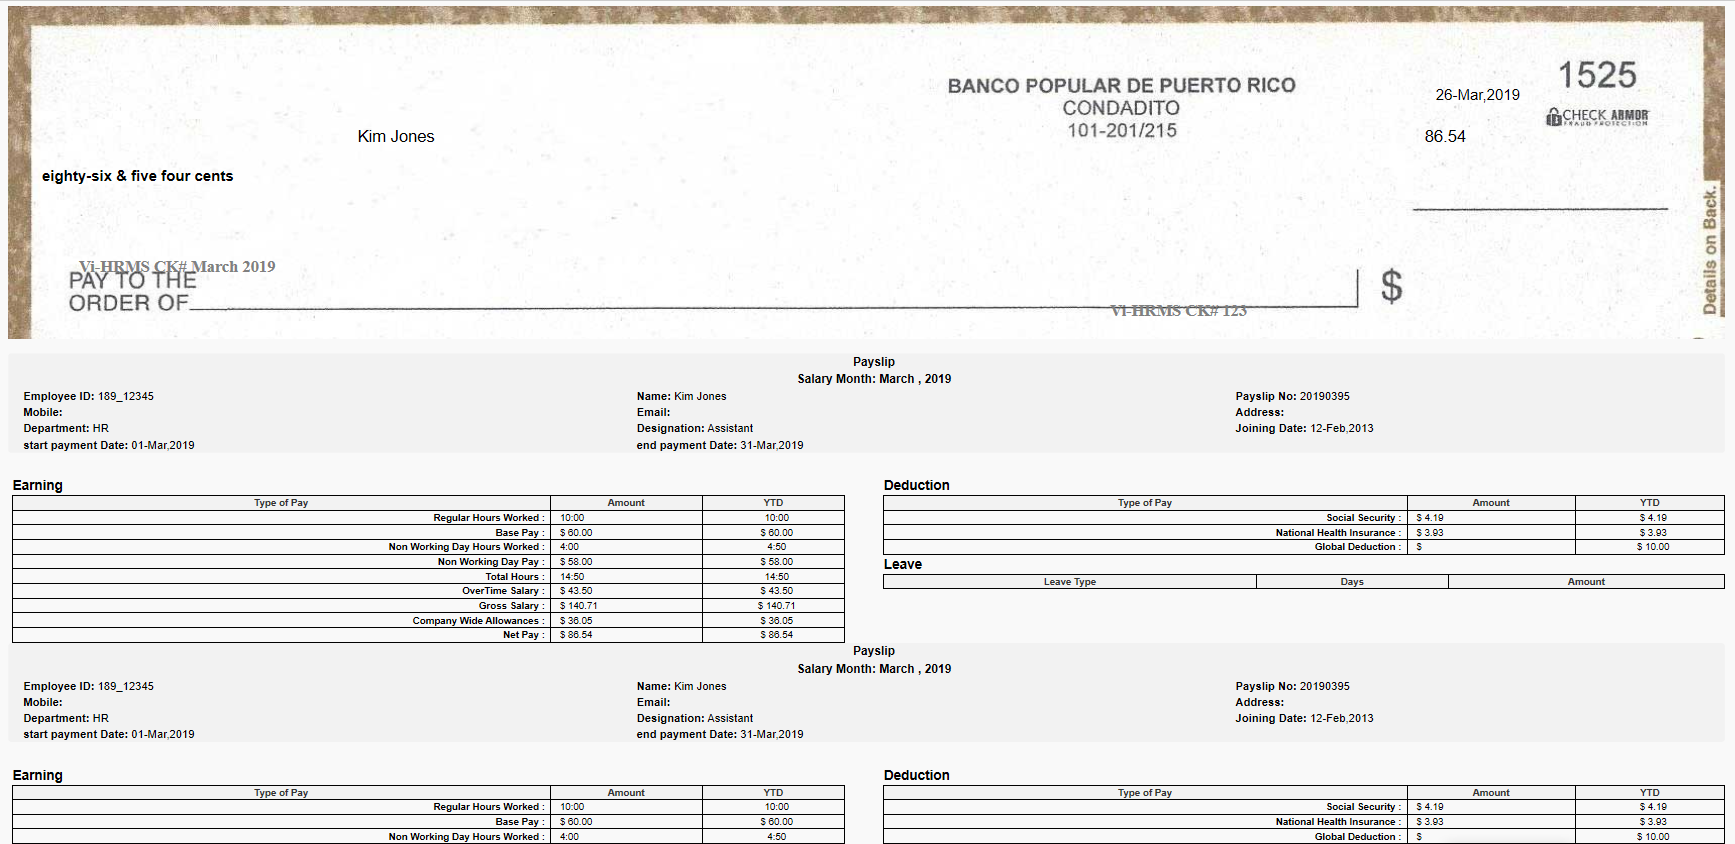
Image 6
The payment salary details can also be viewed in the ViHRMS program by clicking on the blue 'Print' button in the payment coloum of any pay record. Cash payment and Direct Deposits will be viewed in this way when clicking on the referred button. The page will look like the following:

Image 7
Finally, payment records can be deleted. To delete a record, locate the record in the payment history/payment record table and scroll over to the right of the page, until the red, 'Delete' button for a specific record is located. Click on the button, and the pop-up image of Image 8, will appear. Click on the white 'Delete' button to permanently delete the record, and on the white 'Archive' button to Archive the record for future viewing. Clicking on delete, will permanently delete the record, therefore choose Delete or Archive accurately; the deleted record will revert to an unpaid record entry; the Make payment action will be undone.

Make Payment allows Company Admin to quickly calculate employee's pay.
The only two required fields are Start Date and End Date. All employees to be paid in the range, regardless of Payment Frequency, will automatically appear in the Make Payment Screen. To see specific departments, employees or payment frequency, you only have to adjust the filter.
Make Payment Column Descriptions:
Column A: Employee name
Column B: Payment date range
Column C: Shows whether the employee is on a salary or is paid hourly
Column D: Total hours worked. If highlighted, you can click on it number to see a breakdown of the hours worked
Column E: Base Pay
Column F: Overtime Pay
Column G: Total Pay excluding Allowances.
Column H: Total Allowance. Company Wide + Individual
Column I: Bonus (Click on cell to enter bonus amount)
Column J: Gratitude (Click on cell to enter gratitude amount)
Column K: Gross Pay
Column L: Total Deduction. Company Wide + Individual
Column M: Pay Period Deduction (Click on cell to enter amount)
Column N: Net Salary
Column O: Payment Status
Column P: Payment Method
Column Q: Bank Account. This bank account should be defined in the Account setup as a bank account


To pay, simply select the checkbox of the employee, select the payment method and bank account then click on Make Payment to record the transaction
* Only hourly employees with attendance data will be displayed for payment
* Deductions are automatically calculated
*Print Bulk Cheques use the Quickbooks 3-Row Voucher Checks.