Image 1
If October 21st, for example, is a holiday in the Virgin Islands, and an hourly employee does not work, he or she, by law, is to receive their full pay based on their employee status, whether their status is Full time or Part-time. In the event that the hourly employee works on the above, or any holiday, the employee is paid the full hourly pay for that day in addition to the hours worked at a rate of 1.5 times their base rate pay. Therefore, an hourly worker working at a fixed 8 hours per day, that works on a noted holiday, must be gross paid $96.00 for that days' work. This equals their base daily rate pay of $64.00, plus $32.00 of their 1.5x rate of $64.00. This payment application applies to every holiday on which a worker works. If the worker is a salaried worker their pay for working on a holiday will be calculated in the same way; they must receive requisite for a normal days work, plus 1.5x that pay. If that salaried worker would normally receive $100.00 gross daily remeneration , then they must be paid $150.00 for working on days that are listed holidays.
To complete the process of adding individual or group holidays complete the following as described in the two paragraphs below.
Adding a New Holiday:
Individually-
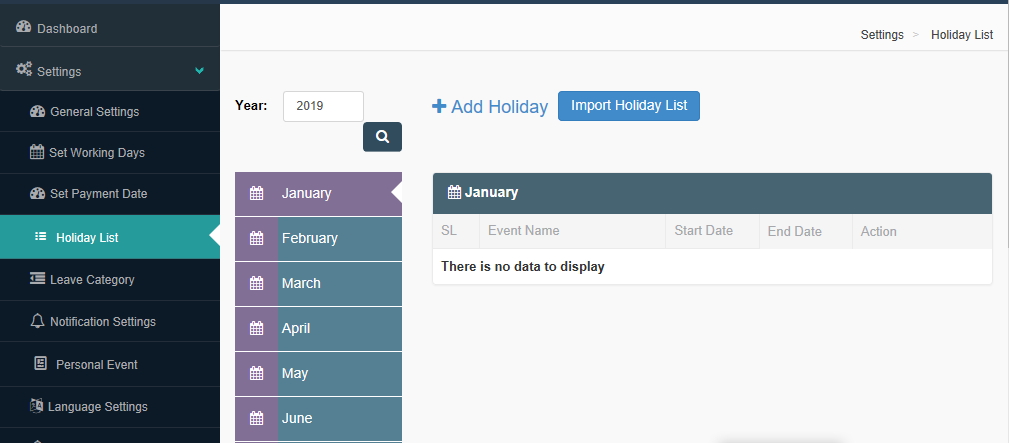
To add holidays one at a time, or individually, click on the '+Add Holiday' button in the near left area of the page, which is adjacent to, and to the left of the 'Import Holiday List' button. See Image 1 or Image 2. The following page will appear, as displayed in Image 2. To fill the holiday information proceed as shown in Image 2. First, the name of the holiday being entered will be filled in the 'Event Name' info slot. Another example would be, Hamilton Lavity Stoutt Holiday. After filling the Event, Holiday, name, the next mandatory information slot to fill is the Start Date of the Holiday. In our initial example of St. Ursala Day, the Start Date of that is October 21st, 2019. And therefore that would be the date to enter in that info slot. Because St. Ursala's Day is a one day event, the 'End Date' of the holiday will also the same as the start date of the Holiday, and therefore would be entered as the same date, October 21st, 2019.
Both the description and colour slots can be filled optional. The description gives more details about the holiday, and is displayed only when the holiday is clicked on from within the employee portal or in the company administration account. The selected colour is the colour which is holiday will be displayed as on the company administration dash board. The default colour is black, as displayed by the #000000 reading. Once all information has been verified and entered. Click on the blue, 'Save' button to the button of the screen, as seen in the middle buttom of Image 2. On doing do, the Holiday will automatically save in the Holiday list of Image 1, and can be searched for from there, by the month in which the holiday is listed. 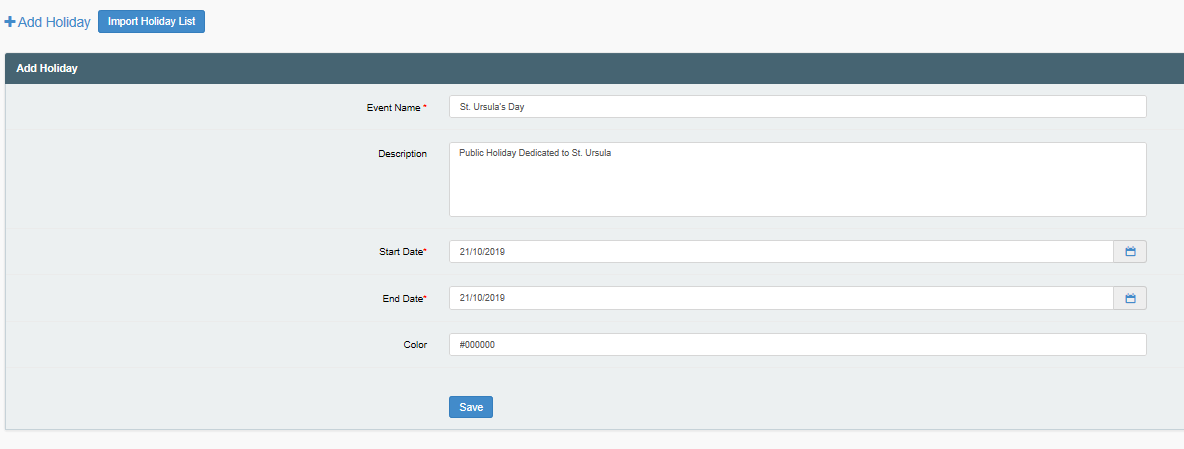
Image 2
Repeat this process of adding individual holidays until all the holidays for the incurrent year have been added and saved into your company account. To view the holidays that have been entered, locate the month that the holiday occurs in, and click on it. For example, St. Ursula's day can be viewed in the calendar by clicking on October, where the entry, just created, will be seen. This is displayed here, in Image 3. 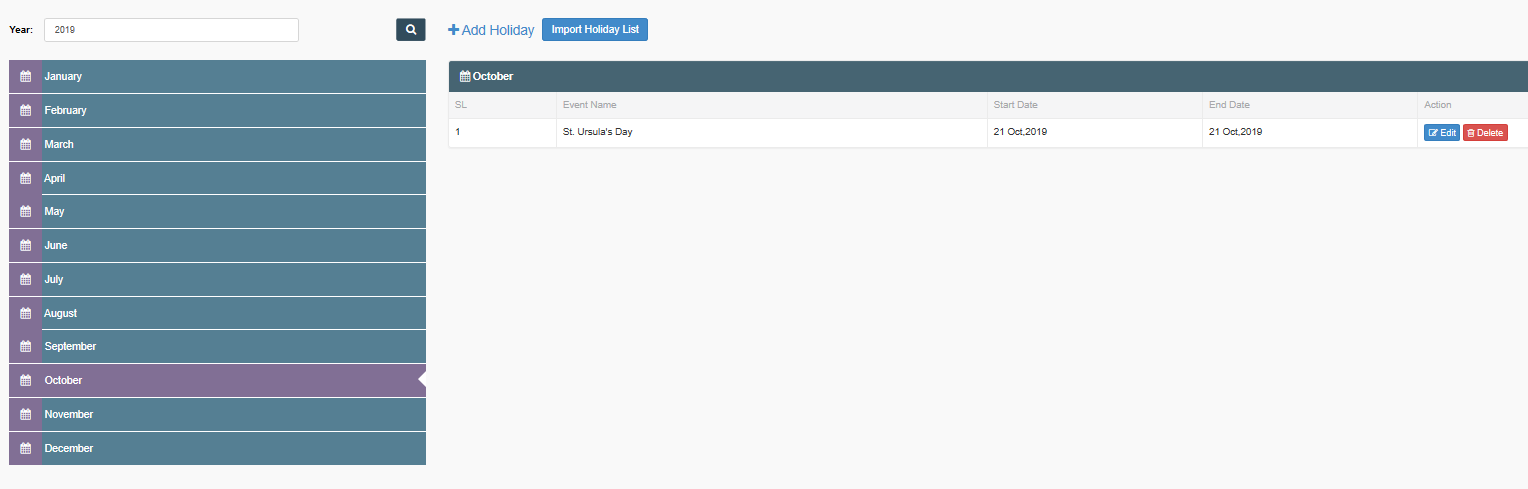
Image 3
All holidays can be viewed in calendar by the same process.
Group (Holiday List)-
To add holidays as a group or using the Import Holiday feature, do the following:
A BVI holiday list, relevant to the year you are in, can be imported. To do this, click on the blue "Import Holiday List" button, to the top middle left of the Holiday List page or the '+Add Holiday' page. Image 1 and 2 respectively. Clicking on that button will open the following pop-up requesting the year for which the holiday list is to be imported: 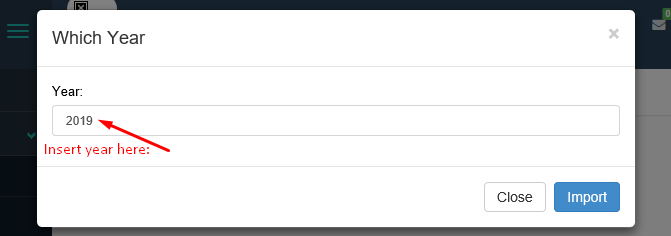
Image 4
Fill the area highlighted as 'year' to the relevant year, for example, 2019 or 2020, and then click on the blue 'Import' button to activate the importing process. To exit the Import Holiday pop-up click on the white 'Close' button