Accounting- Vendors
This vendor account management page, keeps and allows for the management of companies with which your business does business. For example, this page is for the adding and management of businesses whom your companies purchasers office supplies, kitchen inventory or other business specific goods from, dependant on the variety of your company.
On this page will be a list of all added vendors, appearing in table form like the following:
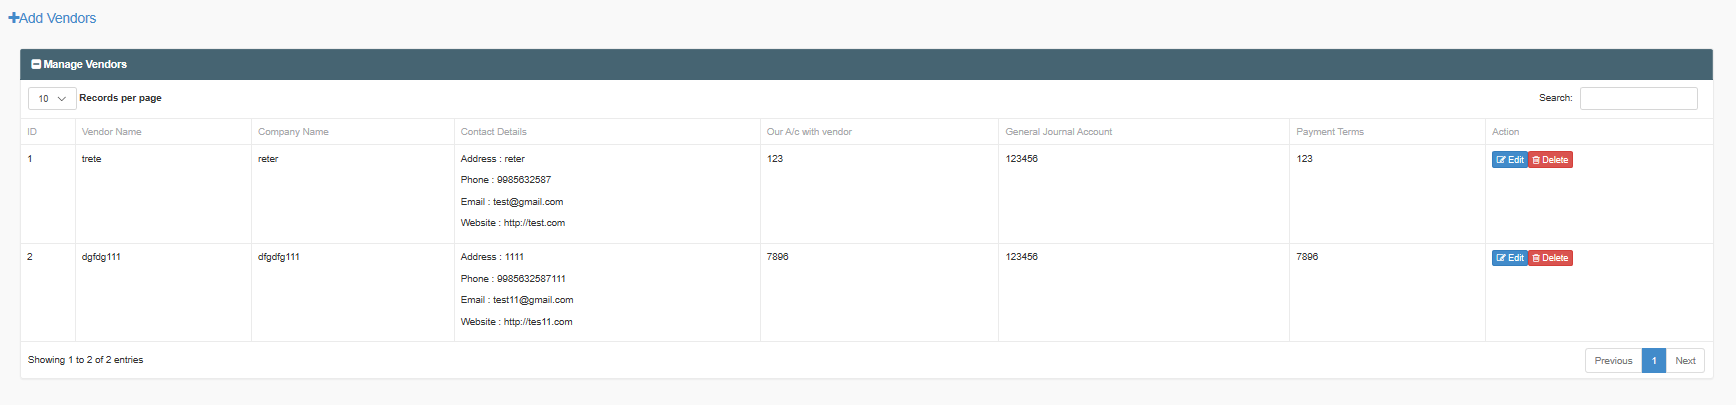
Image 1
To add vendors to this page or list, locate and click on the blue '+Add Vendors' button in the upper left area of the page, as shown in the upper left area of Image 2. Once doing so, the 'Add Vendors' following page will appear. Image 2. All imputs of the 'Add Vendors' page are mandatory to fill. Fill each with the data that is used within your company for the specific vendor being added.
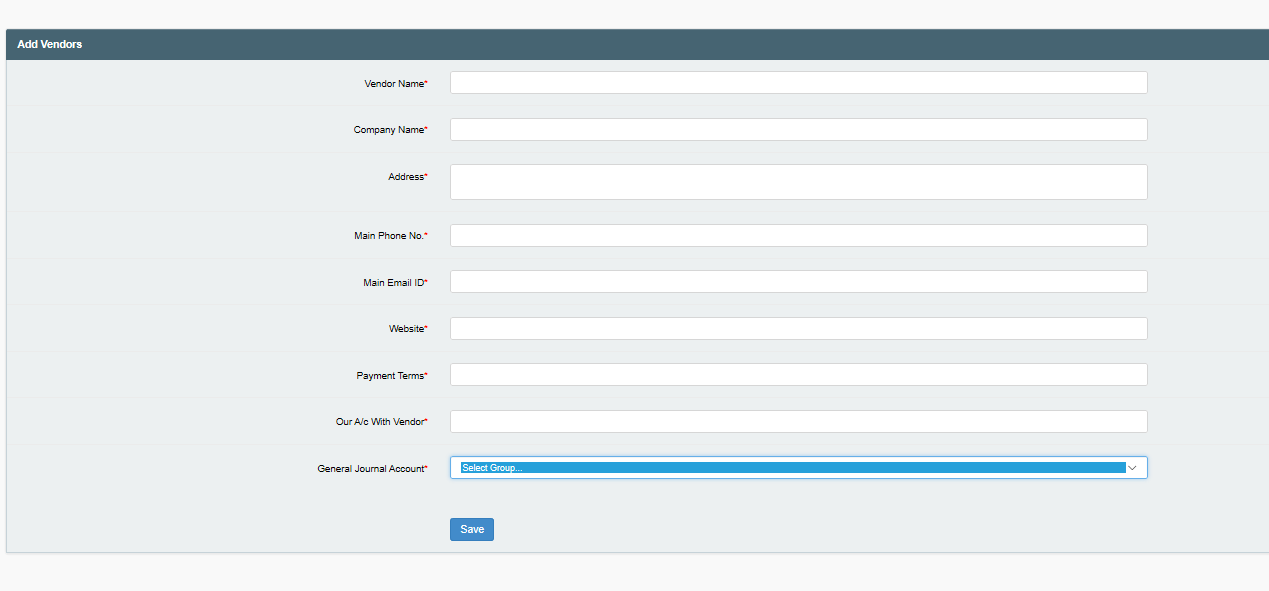
Image 2
When all of the vendor information has been added, click on the blue 'Save' button to complete the process of adding a Vendor name and details. (* Don't recall what the General Journal Account groups link to). The Vendor will then display on the Manage Vendors list, as seen in Image 1.
To add all the Vendors in your company, continue the process described of adding vendors, saving each entry, until all vendors have been added.
A listed Vendor can also be deleted. If a vendor is no longer within use within your company and you want to delete their record, first locate the Vendor that is to be deleted in the table. Once doing so, scroll across to the red 'Delete' button that is in the same line of the table as the Vendor that is to be deleted. Click on the Delete button to start the process of deleting that Vendor. The deletion is non-irreversible. Once clicking on Delete the following pop-up message will appear:
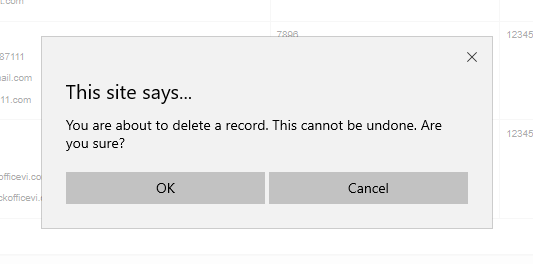
to fully delete the Vendor record entry, click on 'OK', but to cancel the deletion click on 'Cancel'.
If a Vendors details are to be edited and not deleted, the blue 'Edit' button in the same line of the table of as the intended Vendor is to be located. Once it is located, click on the blue edit button and the Add Vendors page for the vendor entry will appear. Modify the data as needed and click on the now 'Update' blue button for the changes to be made to the Vendor entry. It will look like the following:
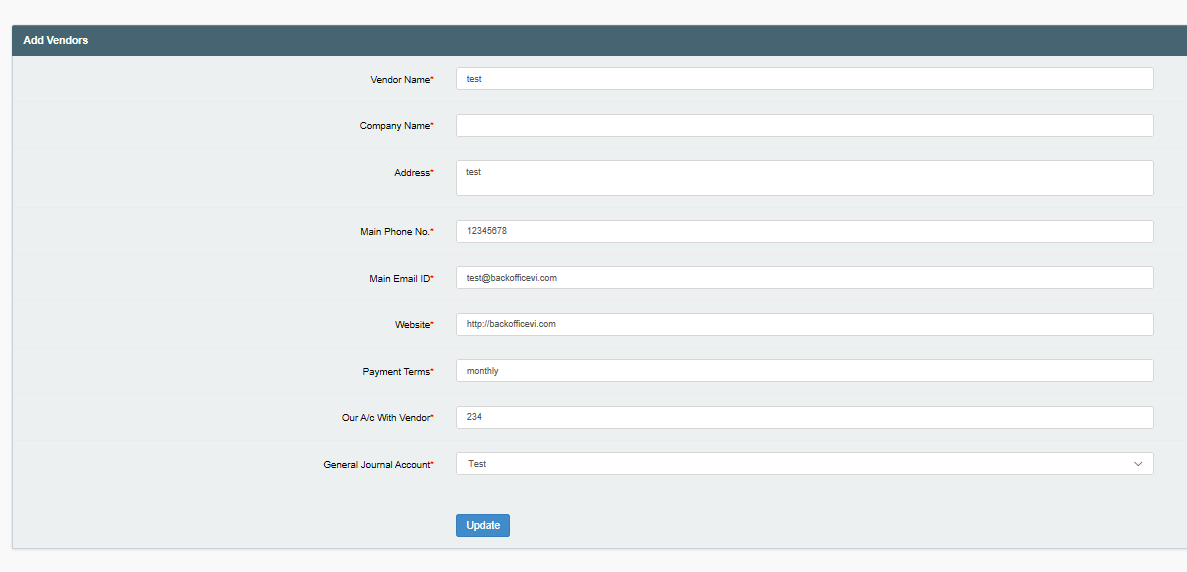
Click on Update to complete the changes.
Page is a list, clicking on each entry does not open it to a new page.